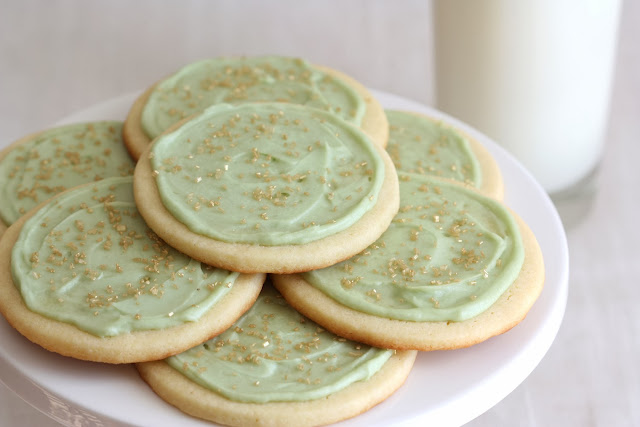
I hope you all had a warm and merry Christmas! I've had a rather busy holiday season this year and I didn't get to spend as much time in the kitchen baking as I would have liked. However, no Christmas is complete in my eyes without making a batch of White Velvet Cutouts.
I first introduced these cookies on my blog back in 2009 when I shared my history with these delicious cutouts. Having originally stumbled across the recipe in an issue of Taste of Home magazine, I fondly remember making these with my mom around Christmas nearly every year of my childhood. While they are delicious and perfect for any occasion, to me they epitomize the holiday season.
I assume these cookies get their "Velvet" name due to their gloriously soft, melt-in-your-mouth texture. A generous amount of cream cheese in the batter gives them a beautiful texture and an unique flavor that is utterly addicting. Growing up, my mom and I would skip chilling the dough and shape these with a cookie press. I tend to favor rolling and cutting them out as the original recipe recommends. Either way will produce a delicious cookie (heck, you can even portion them with a cookie scoop and flatten them slightly before baking). You can cut them out into any shape you wish and color the frosting however you desire, making these truly perfect for any occasion throughout the year.
I hope you'll give these cookies a try soon. I'm fairly certain they won't disappoint and they'll quickly earn a place among your favorites on your holiday cookie tray.
White Velvet Cutouts
adapted slightly from Taste of Home
yield: about 7 dozen cookies
For the cookies:
2 cups (4 sticks) unsalted butter, room temperature
1 (8 oz.) package cream cheese, room temperature
2 cups granulated sugar
2 large egg yolks
1 1/2 teaspoons vanilla extract
4 1/2 cups all-purpose flour
For the frosting:
3 1/2 cups powdered sugar, sifted; divided
4 tablespoons unsalted butter, room temperature
1/2 teaspoon vanilla extract
4-5 tablespoons whole milk or heavy cream; divided
food coloring and sprinkles (optional)
For the cookies:
In the bowl of a stand mixer, cream together the butter, cream cheese and sugar until light and fluffy. Add the egg yolks and vanilla; mix well. Gradually add the flour, mixing until just combined. Divide dough into two disks, wrap well with plastic wrap and chill for 2 hours, or until firm.
Roll the dough out on a floured surface to 1/4-inch thickness. Cut into desired shapes with cookie cutters; place 1 inch apart on parchment lined baking sheets. Bake at 350° for 10-12 minutes or until set (but not browned). Cool 5 minutes on the pan, then remove to wire racks to cool completely.
For the frosting:
Combine the butter, 1 1/2 cups of powdered sugar, vanilla, and 3 tablespoons milk or cream in the bowl of a stand mixer; beat on medium-low until smooth. Gradually add the remaining sugar; beating until light and fluffy, about 3 minutes. Add 1-2 additional tablespoons milk/cream and food coloring, until frosting reaches desired consistency and color. Use an offset spatula or knife to spread a layer of frosting over the cooled cookies. Immediately top with sprinkles, if desired. Store in an airtight container.
After a few hours, the frosting will set and the cookies may be gently stacked for storage.


i love the colors. they are so pretty!
ReplyDeletehow did you get that color?? i love it!
ReplyDeleteThank you! For the light green frosting, I used a few drops of the AmeriColor Soft Gel Paste in the shade Avocado.
DeleteThis recipe is DELICIOUS! Really,really good.
ReplyDeleteLaura, I'm so happy you think so! These are definitely on the top of my list of favorite cookies.
DeleteMaking these right now with my 9 year old sister!
ReplyDeleteI'm making these right now with my 9 year old baby sister!
ReplyDelete