Showing posts with label holiday. Show all posts

Monday, December 2, 2013

Mini Pumpkin Pies

I recently treated myself to a mini Tartlet Baking Set from Williams-Sonoma that I had had my eye on for well over a year.  The set includes a pan with wells for 12 miniature tarts and a coordinating cutter and tamper for shaping almost any sort of pie/tart dough imaginable.  I first tested out the pan using some leftover graham cracker dough I had on hand and made little graham cracker tarts that I filled with a lemon-cream cheese filling and topped with whipped cream.  They were adorable and a hit.

I was thrilled with how easy and effortless the Tartlet Baking Set was to use and I couldn't wait to use it with more recipes.  Recently I catered a little spread of desserts and sandwiches for a friend's baby shower and among the desserts, I made these Mini Pumpkin Pies for the very first time.  I adapted a Bakerella recipe for use with my new baking set and topped mine with a stabilized Vanilla Bean Whipped Cream (the stabilizing technique picked up from Baked Bree has become my favorite way to insure long-lasting whipped topping on all my homemade treats).

The Mini Pumpkin Pies were utterly adorable, perfectly tiny 2-3 bite treats and they were a huge hit with the folks at the shower.  I fell in love with the look and the recipe and I couldn't wait for an opportunity to make them again.

Fast forward a few weeks to this past weekend and I decided to whip these up to take to a late Friendsgiving dinner.  Fortunately I had several leftover and could take a few photos to share with you all here on the blog.  These Mini Pumpkin Pies are a new favorite of mine and I expect I'll make them quite a lot over the coming years.  Don't let the small size of the pies full you, they pack a punch of flavor along with their stunning presentation.  Give these a try even if you're not a fan of pumpkin pie (I'm not usually), the filling gets a unique twist with the addition of cream cheese and these are almost a pumpkin pie/cheesecake hybrid.  So freakin' delicious!

I know Thanksgiving is over, but these would be perfect for any holiday gathering or just because... even in the middle of summer... because they are that good.

Mini Pumpkin Pies
adapted from Bakerella and Baked Bree
yield: 3 dozen mini pies

For the Pies:

3 Pillsbury Refrigerated Pie Crusts (1.5 packages)
8 oz. cream cheese, room temperature
1/2 cup sugar
1 cup canned pumpkin
2 large eggs
1 teaspoon vanilla extract
1 teaspoon pumpkin pie spice

Preheat your oven to 350°.

In the bowl of a stand mixer, using the paddle attachment, mix together the cream cheese, sugar, canned pumpkin, eggs, vanilla, and pumpkin pie spice until well combined (but don't over mix).  Set aside.

Unroll one of the prepared pie crusts onto a sheet of wax paper or a lightly floured surface.  Using the cutter from the Williams-Sonoma Tartlet Baking Set, cut out 12 portions of dough from the crust.  Center each piece of crust on top of the wells in the tartlet baking pan, then use the provided tamper to carefully compress and shape each individual tart (making sure to press gently, but firmly until the crust reaches the top of the pan).

Spoon the pumpkin filling into each prepared crust until about half full (1 to 1 1/2 tablespoons of filling per crust).

Bake the filled pies in the preheated oven for 14-16 minutes, until the filling is puffed and the crust is lightly golden.

Allow the pies to cool for a minute in the pan, then remove them to a cooling rack to cool completely.

Place the baking pan in the freezer to quickly cool it, and repeat with the second and third pie crusts.

Allow the pies to cool completely, then store in the refrigerator while preparing the Vanilla Bean Whipped Cream topping.


For the Vanilla Bean Whipped Cream:

1 tablespoon cold water
1 teaspoon unflavored gelatin
1 cup very cold heavy whipping cream
3 tablespoons granulated sugar
1 teaspoon vanilla bean paste

In a small bowl, sprinkle the gelatin over the cold water and stir.  Let the gelatin stand for a minute until it is absorbed by the water.  Microwave the gelatin mixture on high for 15-20 seconds, or until the gelatin has melted and the mixture is clear.  Set aside.

In the bowl of a stand mixer, begin whipping the heavy cream with the whisk attachment on medium-high speed until it begins to thicken.

Gradually add in the sugar, a tablespoon at a time, and continue whipping until soft peaks form.

Next, add in your vanilla bean paste and liquified gelatin mixture and continue whipping until stiff, silky peaks form (do not over whisk or the mixture will become curdled).

Transfer your whipped cream to a piping bag fitted with a large star tip and pipe a small star of whipped cream atop each Mini Pumpkin Pie.  Serve immediately or refrigerate up to three days.*

*Similar to a cheesecake, I have found that the texture and taste of the pumpkin filling is best after these have had 6-8 hours to chill in the fridge.  These can certainly be served immediately, but the pumpkin filling is more mild in flavor until it has chilled in the fridge for a few hours.  Therefore, I recommend making these the night before you plan to serve them.  With the stabilized Vanilla Bean Whipped Cream, these keep exceptionally well for up to three days.  Around the third or fourth day, the crust begins to soften a bit and separate from the filling, but they are still delicious.

Wednesday, December 26, 2012

Gingerbread Cheesecake

I hope you had a very merry Christmas!  The hubby and I spent last weekend visiting my family and returned home in time to spend Christmas Eve and day with his family in town.

We traditionally get together with my husband's family on Christmas Eve to enjoy dinner and to exchange presents among the "kids."  Then we have a more casual day on Christmas with breakfast, more gift exchanging and whatnot.

Lately I've been kind of in a cheesecake baking mood (I made a Maple Cheesecake for Thanksgiving and a Pumpkin Cheesecake soon after for a "Friendsgiving"), so I figured a Gingerbread Cheesecake would be the perfect dessert for Christmas Eve dinner with the hubby's family.  I had this Martha Stewart recipe in the back of my mind to try for a couple of years and was glad I finally did because it was both an adorable and delicious addition to dinner.

This cheesecake takes a little more effort than most, but the result is well worth the time put in.  The crust is make from a slab of baked, cooled, then crumbled homemade gingerbread and the finished cheesecake is topped with little homemade gingerbread men.

The original recipe suggests topping the cheesecake with six gingerbread men, but I thought that suggestion, while cute, was a little impractical (the gingerbread men would have to be removed prior to slicing/serving the cheesecake).  Instead I decided to make my gingerbread men on the miniature size, perfect to top each of twelve individual slices.

Of course, if you're in a hurry, you could always substitute a crust made of store bought gingersnaps for the homemade gingerbread crust.  And, while the homemade gingerbread men topping the cheesecake are adorable, they certainly aren't necessary.  If you do have the time to put some extra homemade touches on the cheesecake, these certainly give it a lot of character.

If you're having a late Christmas celebration and need a dessert to bring, this will surely bring a "wow" factor to the table.  Or you could file away the idea (perhaps to your Pinterest board of choice) for next year.  Either way, if you get a chance to make this cheesecake, you won't be sorry.

Gingerbread Cheesecake
via Munchkin Munchies, originally from Martha Stewart
serves 12

all-purpose flour, for dusting
Gingerbread Cookie dough (recipe below)
4 tablespoons unsalted butter, melted
1 3/4 cups granulated sugar, divided
2 pounds cream cheese, at room temperature
1 teaspoon pure vanilla extract
4 large eggs, at room temperature
1/4 cup unsulfured molasses
1/4 teaspoon salt
1 1/2 teaspoons ground ginger
1 teaspoon ground cinnamon
1 teaspoon freshly grated nutmeg
1/4 teaspoon ground cloves
1/2 teaspoon finely grated lemon zest
12 mini gingerbread men (from recipe below)

Preheat oven to 350 degrees.  Wrap the exterior of a 9-inch springform pan in 2 layers of foil.  Optional: before wrapping pan with foil, line bottom of springform pan with parchment paper (closing it in place with the locking mechanism) and spray pan with cooking spray.  This optional step making the cheesecake easier to slice and serve later on, but certainly isn't necessary.

On a generously floured piece of parchment paper, roll 1/2 of the Gingerbread Cookie dough into a 13-by-10-inch rectangle, about 1/4 inch thick.  Brush off excess flour.  Slide dough and parchment onto a baking sheet.  Bake until firm and golden brown, about 14 minutes.  Let cool completely on sheet on a wire rack.  Break into large pieces, then pulse in a food processor until finely ground.

Combine butter, 1/4 cup sugar, and 2 cups cookie crumbs in a bowl.  Press mixture firmly and evenly into bottom and one-third of the way up sides of the prepared pan.  Bake until set, about 10 minutes.  Let cool on a rack.

Reduce the oven temperature to 325 degrees.  Beat cream cheese in the bowl of an electric mixer on medium speed until fluffy, about 3 minutes.  Beat in remaining 1 1/2 cups sugar and the vanilla, scraping down the sides of the bowl as needed.  Reduce speed to low.  Add the eggs, 1 at a time, beating well after each addition and scraping the sides of the bowl as needed.  Beat in molasses, salt, spices, and lemon zest.  Pour the filling in the prepared and cooled crust.

Place cheesecake in a large, shallow roasting pan.  Transfer to the oven and carefully add enough water to the roasting pan to come about halfway up the sides of the springform pan.  Bake until cheesecake is set bull still slightly wobbly in the center, 60 to 65 minutes (mine took closer to 80 minutes).  Carefully remove the roasting pan from the oven and allow the cheesecake to cool in the roasting pan until the water is lukewarm.  Remove the springform pan from the roasting pan and allow the cheesecake to further cool down to room temperature on a wire rack, about 1-2 hours.  Cover with plastic wrap and refrigerate for at least 8 hours (preferably overnight).

Before serving, remove the cheesecake from the springform pan and slice into 12 servings using a hot knife (or even better heavy white thread or unflavored dental floss).  Arrange a miniature gingerbread man on each of the slices, and serve immediately.

Gingerbread Cookies
via Munchkin Munchies

*Note: You will use half the recipe to make a slab to use for the cheesecake crust.  Refrigerate the other half for 30 minutes then roll, cut into miniature gingerbread men, and bake for cheesecake decoration.

1/2 cup unsalted butter, at room temperature
1/2 cup light brown sugar
1/2 cup molasses
1 large egg, at room temperature
3 cups all-purpose flour
1 teaspoon baking soda
2 teaspoons cinnamon
1 teaspoon ground ginger
1/2 teaspoon nutmeg
1/2 teaspoon allspice

In the bowl of a stand mixer, combine the butter, sugar, molasses and egg on medium speed until light and fluffy.  In the mean time, sift together the remaining ingredients in a large bowl.  Once the butter mixture is ready, slowly add in the flour mixture, beating until just combined.

Roll half the dough immediately for the crust according to directions above.  Wrap the remaining half of the dough in plastic wrap and chill for 30 minutes.  On a floured surface, roll the chilled gingerbread men dough to 1/4 inch thick.  Cut out gingerbread men using a small cookie cutter (one about 1 1/2 inch tall should be a good size to top each of 12 cheesecake slices).  Bake on a parchment-lined baking sheet at 350 degrees for 8-12 minutes.  Let cool on pan for 10 minutes, then remove to a cooling rack to cool completely.  Once cool, you can leave the gingerbread men plan or decorate them with royal icing or melted white chocolate (my preference).

Wednesday, July 4, 2012

Happy Fourth of July!

I hope you all have a safe and happy Fourth of July.  I've been busy preparing our little home for what is becoming our annual Fourth of July party.  Unfortunately, due to the crazy heat and lack of rain we've been experiencing in our part of Kentucky, all personal fireworks have been banned so it looks like we'll be celebrating the holiday with water instead of fire.  Husband purchased an obscene amount of fireworks before the personal firework ban was announced, so we'll be hosting another party in the future once the ban has been lifted so we can enjoy them.

I made my very first wreath, a festive flag wreath following this tutorial, and am excited for it to welcome our guests today.

I hope you all enjoy a wonderful day with friends and family!

Monday, October 31, 2011

Happy Halloween!

Just thought I'd quickly share the "Zipper Face" Halloween costume I wore to a party with friends on Sunday. Gory costumes aren't usually my thing as I much prefer to dress as something pretty or whimsical, but this year I couldn't decide on a last minute costume that fit into my self-imposed $10 budget. My hubby suggested I go for this look and I figured, why not! A zipper, some liquid latex, and lots of fake blood later and I was decked out and disgusting.

I hope you all had a frightful Halloween!

Sunday, April 4, 2010

Happy Easter!

I hope you all had a wonderful Easter enjoying the beautiful spring weather, spending time with family and friends, and celebrating a risen savior!

I enjoyed a wonderful time spent with the hubby and his family. My mother-in-law and I spent several hours last night doing some preparations for today's dinner. I made the nest-inspired chocolate cake above. It didn't turn out as well as I was hoping. I had to use two 4 oz. Hershey's chocolate bars instead of the huge 16 oz. bar the recipe called for, so the chocolate for my nest was a little more rustic looking than the perfectly chopped chocolate from the Martha Stewart inspiration. It was still pretty cute though, and quite yummy!

I also made modified versions of Ina Garten's Chicken with Forty Cloves of Garlic and Parmesan Smashed Potatoes. We also had some amazing ham, rolls, corn and broccoli. Homemade beer cheese and deviled eggs served as appetizers while we finished cooking this afternoon. My mother-in-law also got the brilliant idea to turn an almond Jello recipe she loves into egg-shaped Jello Jigglers. I wish I would have snapped a photo (I was too full at that point to even think about photographs), because they were perfect! They were opaque white and looked exactly like hard-boiled eggs. I insisted that they become a tradition because they were too cute! She also prepared Rice Krispies Treats to make Peep Sushi but we were all too full and folks had to part ways before we could get around to making our sushi--so sad!

We had a wonderful time and I'm already thinking ahead to the cute treats I want to try out for next Easter. There are still a few spring-themed treats that I want to try in the next month, including some adorable petit fours which I had originally planned to make for today but ran out of time. I am hoping to make them next weekend. I am going to relax a bit this evening, probably spend some time in the studio (because hardly a day goes by where I don't work at little) and hang out with my adorable hubby.

Monday, December 14, 2009

Day 5: Handmade Holiday Gift Ideas

The project for Day 5 of my Twelve Days of Christmas: Handmade Holiday Gift Ideas comes from Disney of the lovely blog Ruffles & Stuff. If you are familiar with Ruffles & Stuff, you know about all the fantastic projects Disney dreams up! Disney's skill to transform objects from bland to fabulous are seriously inspirational! These "Granny Chic" Slippers are one of my favorite creations she has come up with. Starting off with simple ballet slippers you can get from Wal-Mart or pretty much any department store, you can create a truly fabulous and feminine gift! Disney's tutorial shows how to cut out and form gorgeous fabric flowers which are simply sewn onto the slippers. All the steps for cutting, forming and sewing the flowers can be found on her tutorial and they are so simple anyone with a pair of scissors, a needle and some thread could follow them. No prior sewing experience is needed to create these gorgeous slippers.

If you wanted to simplify the project even further, you could pick up some pretty felt or crocheted flowers from the craft section of Wal-Mart or from any craft store. You could simply buy a few flowers to coordinate nicely with the color of the slippers you pick out and sew the pretty ready-made flowers onto the slippers. Talk about a fast and inexpensive gift idea!

I think these are gorgeous and girly. With winter ahead, wouldn't it be nice to give such a warm and cozy gift?

Friday, December 11, 2009

Day 4: Handmade Holiday Gift Ideas

All photos are from Sarah of The Small Object.

Day 4 of my Twelve Days of Christmas: Handmade Holiday Gift Ideas is another little project from Amanda of Bake it Pretty. Vintage buttons are all the rage and with so many folks collecting buttons these days, they make a gorgeous gift. Brightly colored vintage buttons in all sorts of shapes and styles look lovely on display in a glass container or worn colorfully on a sweater or blouse. But I imagine you never thought to consume them... until now! You see, those pretty buttons above are actually candy. They are so simple to make with the aid of a chocolate mold and they make fantastic gifts when packaged whimsically.

Amanda has a great tutorial on her blog with directions on how to use the chocolate molds and other ingredients (all of which can be found in the Bake it Pretty online shop) to make these precious little treats. You can make these buttons in all the colors of the rainbow and you can even add candy flavorings to make them in all sorts of playful color/flavor combinations.

Amanda even created the most charming little printable packaging (click for Amanda's printable PDF) you can staple to the buttons you bag up as gifts. Isn't that the cutest thing ever? While these look like something you'd find in the most charming confiserie, they are quite simple to make using Bake it Pretty products and Amanda's gorgeous tutorial.

I purchased a chocolate button mold of my own and several colors of candy melts and I can't wait to make little bags of buttons for my friends this holiday! I also bought several other chocolate molds--a few in particular that I am so excited about--and I plan to share my candy making adventures with you as soon as I receive everything and put them to use!

I can't wait!

Wednesday, December 9, 2009

Day 3: Handmade Holiday Gift Ideas

The third Handmade Holiday Gift Idea comes from Amanda of Bake it Pretty. These cupcake ornaments are super cute and can be customized to all sorts of beautiful colors. These would look so retro and festive on a white or pink tree! I'd love to make a few to place around my kitchen even after the holidays. Grouped together on a pretty cake stand, as in the photo above, these would be a darling centerpiece for a holiday gathering. Sparkly and whimsical, these would make great little stocking stuffers or small gifts. Amanda even suggests using mini versions as decorations for presents themselves! In the spirit of my Handmade Holiday Gift Ideas, these ornaments require a manageable list of supplies and are super simple to create!

Check out Amanda's post on the Bake it Pretty blog for a list of the supplies you will need as well as a full step-by-step tutorial on how to craft these sweet treats!

Monday, December 7, 2009

More Holiday Baking

Yesterday afternoon I continued my holiday baking. This time I stepped things up a notch and made Spritz Cookies, Snowball Cookies and Chocolate Bon Bon Drops! I had been planning to make Spritz Cookies for a while as they are my hubby's favorite Christmas cookie. I used a simple recipe from Betty Crocker because, in all honesty, my hubby likes plain and simple. Unfortunately I think we both agreed that these were too plain. I think next time I make Spritz Cookies I'll incorporate either some orange zest or some cinnamon in the batter to give them more depth.

I was pretty satisfied with the Snowball Cookie recipe I used. It had been a while since I had had these cookies and I honestly couldn't compare this recipe to others I've had before from memory. They had a great, pleasantly crumbly texture and a nice pecan shortbread flavor. I meant to add a teeny bit of cinnamon to my batter but didn't make a note on the recipe and totally forgot to add it in my following the recipe. I'll definitely try the cinnamon in these next time as I think the subtle hint would be a really lovely addition.

You probably know these cookies as Mexican Wedding Cookies or Russian Tea Cakes. Really, they go by so many names! All you need to know is that they are absolutely delicious. I called them Snowball Cookies because they certainly look like little snowballs and I find that name much more befitting to the season.

Next up was the star of the day, in my opinion. The Chocolate Bon Bon Drops from King Arthur Flour were incredible, as I expected they would be as I have yet to try a KAF recipe that disappointed. Seriously, folks, their Fudge Brownies are insane! The recipe suggested using a teaspoon cookie scoop for these. I only have a tablespoon and a half scoop in my collection at the moment. The result was a slightly bigger cookie (the recipe makes 24, I got 18). I baked mine a few minutes longer than the recipe and the result was a rich, decadent cookie! Still warm out of the oven these were incredibly soft and fudge-like. Seriously moan-inducing, folks. You make a simple vanilla glaze which is applied while the cookies are still warm which leads the glaze to run over the surface of the cookie. After these cool down they set up a bit but still retain their soft texture. If you are a fan of super soft brownies, you will love these cookies! I plan to make these again soon. I really love the fact that the recipe makes a manageable number of cookies and the portions in the recipe actually lend very well to being halved, if you want even fewer than two dozen. Trust me though, you won't want to halve this recipe. I most certainly will be making these again with my Double-Dutch Dark Cocoa once it arrives. I used some plain ol' Hershey's cocoa for mine as that was all I had in the pantry at the time. I imagine the flavor will be a thousand times better with a richer cocoa. King Arthur Flour, I love you and I will forever sing your praises.

Snowball Cookies
adapted slightly from Epicurious
makes about 4 dozen

1 cup (2 sticks) unsalted butter, room temperature
2 cups powdered sugar, divided
2 teaspoons vanilla extract
2 cups all purpose flour
1 cups pecans, finely chopped

Using an electric mixer, beat butter in a large bowl until light and fluffy. Add 1/2 cup powdered sugar and vanilla; beat until well blended. Beat in flour, then pecans. Divide dough in half, form each half into a ball, then flatten slightly. Wrap separately in plastic wrap; chill until cold, about 30 minutes.

Preheat oven to 350 degrees. Prepare remaining 1 1/2 cups powdered sugar by sifting it into a medium-sized bowl. Set aside.

Working with half of the chilled dough, roll dough by 2 teaspoonfuls between palms into balls. Arrange balls on a parchment lined baking sheet, spacing 1/2 inch apart. Bake cookies until golden brown on bottom and just pale golden on top, about 18 minutes. Cool cookies 5 minutes on baking sheet. Gently toss warm cookies in powdered sugar, coating completely. Transfer coated cookies to a rack to cool completely. Repeat procedure with remaining half of dough. After cookies are completely cooled, coat them a second time in the powdered sugar before storing them in an airtight container at room temperature.


Chocolate Bon Bon Drops
from King Arthur Flour
makes about 2 dozen

12 tablespoons unsalted butter, softened
1/4 cup Double-Dutch Dark Cocoa or Dutch-process cocoa
1 cup confectioners' sugar
1/2 teaspoon salt
1 1/2 teaspoons vanilla extract
1 1/2 cups King Arthur Unbleached All-Purpose Flour

Vanilla Glaze
2 cups confectioners' sugar, sifted
1/4 cup heavy cream OR half and half OR milk (I used heavy cream)
1 tablespoon vanilla bean paste OR vanilla extract (I used vanilla bean paste)

Place all the cookie dough ingredients in the bowl of your stand mixer. Beat on medium speed until a soft, smooth dough is formed. Remove from the bowl, and shape into a 3/4" thick disk. Wrap well in plastic wrap and chill for 30 minutes or as long as overnight.

Preheat the oven to 350 degrees. Line two baking sheets with parchment paper. Shape the dough into small balls, about the size of a a large gumball (a teaspoon cookie scoop is a huge help here). Space evenly on the cookie sheets, leaving about 2" between cookies. Bake for 7 to 10 minutes. Watch the cookies carefully to avoid scorching the bottoms.

Remove the cookies from the oven and allow to cool slightly on the pans while you prepare the glaze. For the glaze, blend the sifted confectioners' sugar with the heavy cream and vanilla bean paste. This glaze will be thick, almost icing consistency. If you use half and half (or milk) and vanilla extract, the glaze will be much thinner and not as rich.

Using a teaspoon, portion the glaze over the barely warm cookies. You can pipe the glaze from a piping bag or zip-top bag with a corner cut off as well (this is what I did). Top with chocolate pearls, slivers of maraschino cherry, or chocolate sprinkles (I skipped this step as I had none of these). Store any leftovers at room temperature for up to a week.

Day 2: Handmade Holiday Gift Ideas

The second post in my series The Twelve Days of Christmas: Handmade Holiday Gift Ideas is an idea that was inspired by a project from Martha Stewart. Martha Stewart provides a very pretty tutorial on a great way to incorporate recycling in your handmade gifts. Martha's tutorial suggests reusing remnants of old candles, which I think is a great idea! I just hate it when I have a fantastic candle that, for whatever reason, doesn't burn all the way to the bottom of the wick. It's quite easy to collect scrap candle bits for this project if you are like me and burn candles often. You can simply collect the extra bits throughout the year, keeping them in a ziplock bag until you are ready to melt them down and give them new life.

If you don't have any old candle bits laying around, don't fear. I didn't last Christmas when I decided to make some teacup candles of my own. Instead you can quite easily find great candle supplies at stores such as Michaels. They carry large containers of microwavable soy wax which makes creating these teacup candles a total breeze (a lot easier than the Martha Stewart version, if you ask me). Following the directions on your wax, you can simply microwave it in a glass container--I suggest a large glass measuring cup to make pouring the melted wax into your teacups easier--and once the wax is melted you may add any scents or dyes that you'd like. Wicks, scents and dyes can be found along side the microwavable soy wax in your local craft store. This is where you can really customize the candles! Pick your preferred scent and you could choose to leave the candles white or dye them to match the colors of your teacups. The teacups themselves could be new, or you could search second hand shops such as Goodwill for some great vintage ones! I found some pretty vintage teacups with a simple Asian-inspired design last winter when I made these candles. They were quite cute! Once you have your wax melted, scented and dyed, you are ready to pour the wax into your chosen vessel. Martha Stewart provides a helpful hint of using wooden skewers to help suspend your wick properly in your teacup while you pour the wax and wait for it to harden. After you pour the wax and it hardens completely, you are ready to trim the wick and package your pretty little gifts! I think these would be absolutely darling packaged in little cupcake boxes!

This project is as simple as choosing your teacups, purchasing your candle supplies, microwaving, stirring and pouring! The simplicity of this project is unbelievably when compared to the elegance of the finished product. You could easily make several of these in an hour. Just think how sweet it would be to present a lovely teacup candle to each of your girl friends! They are so chic and remind me of something you'd find at Anthropologie.

If you decide to purchase second hand teacups, or even use some old ones you may have around the house, this gift idea can be quite inexpensive! I believe my soy wax, wicks and chosen scent (vanilla, please) came in under $10. Also, might I note that there are always 40% off coupons for Michaels floating around online. I found my teacups at Goodwill for around $1 each. I was able to make 4 teacup candles with a single container of soy wax. The teacup candles are a really fun, feminine gift! And as an added bonus, after the recipient burns their candle they will have a pretty new teacup to add to their collection.

Thursday, December 3, 2009

Lace and Lights

How seriously gorgeous is this Paper-Doily Wreath from Martha Stewart? I just love how whimsical and feminine it is! I think it would even be pretty for non-holiday decor. There are tons of wreath projects over at Martha Stewart. Unfortunately I won't have any time this holiday season to craft one of my own, but for those who do, there are all sorts of beautiful wreaths to be inspired by.

Wednesday, December 2, 2009

Day 1: Handmade Holiday Gift Ideas

I decided to start a little series The Twelve Days of Christmas: Handmade Holiday Gift Ideas. From now until Christmas I will share with you twelve of my favorite handmade holiday gift ideas that anyone--even the most craft challenged individual--could create. A little encouragement to motivate everyone to get in the spirit of giving handmade this holiday season.

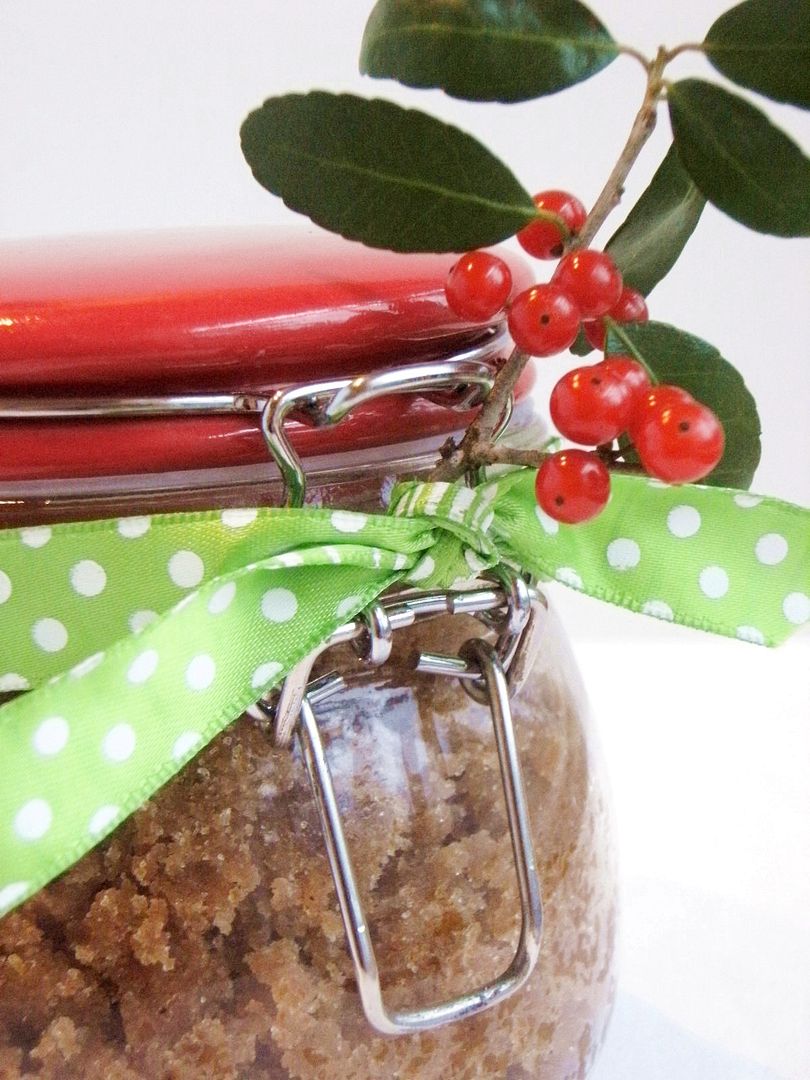
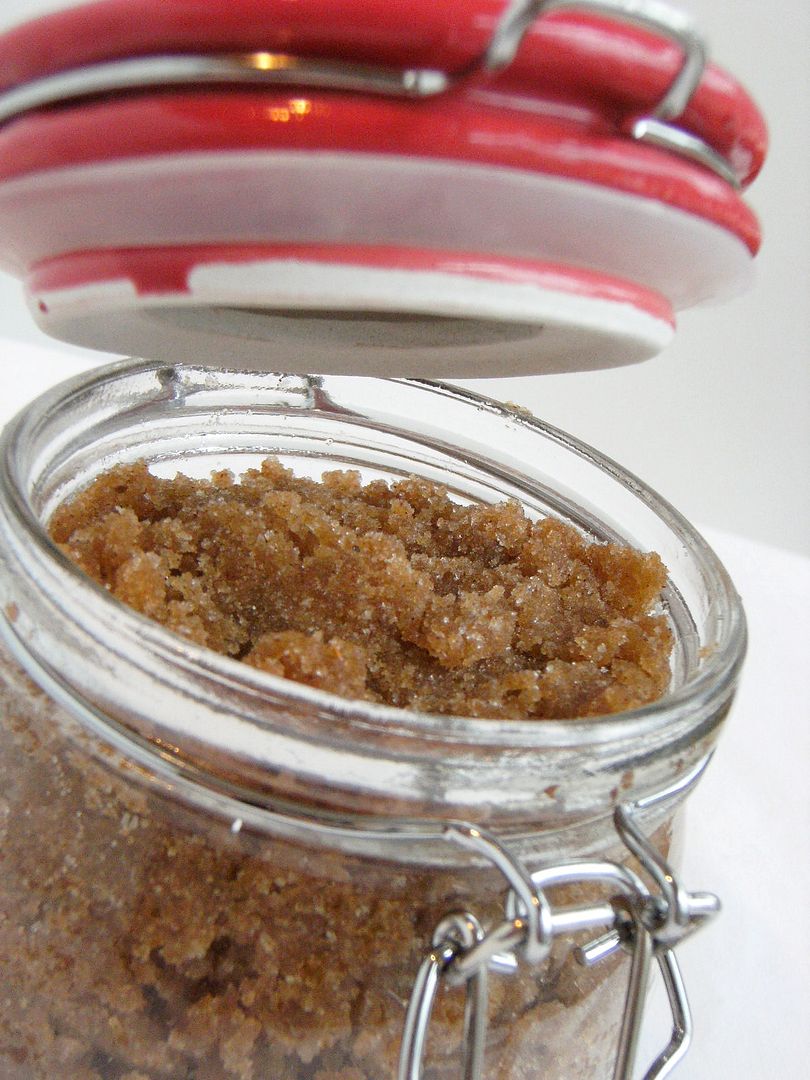
When I saw a post by Bridget of Bake at 350 for this Brown Sugar and Spice Body Scrub and immediately fell in love! I love giving handmade gifts for the holidays and this scrub would make a fabulous present for all the girly girls in your life. You could easily whip up a big batch of this scrub, separate it out into pretty little containers, and have one to give to each of the beautiful women you know.

Doesn't that just look divine? What woman doesn't love pampering herself with luxurious bath and body products! I have been so impressed with all the beautifully packaged bath & body products that have popped up all over Etsy the past couple of years. There are now so many great options for all-natural beauty products. Many of the great products we all love can easily be whipped up in an afternoon after procuring a few ingredients. When packaged lovingly with sweet little handmade labels and a decorative accent or two, these homemade treats make great gifts!

The recipe for this Brown Sugar and Spice Body Scrub seriously could not be any easier! It could be effortlessly doubled, tripled, quadrupled... to make a large batch for multiple recipients.

The recipe comes from C & H Sugar and is part of a great selection of homemade gift ideas.

For a single batch you'll need:
1 cup light brown sugar
1 cup pure cane sugar
3/4 cup almond oil
2 tsp. cinnamon
2 tsp. ginger
2 tsp. nutmeg
16oz. glass container with lid

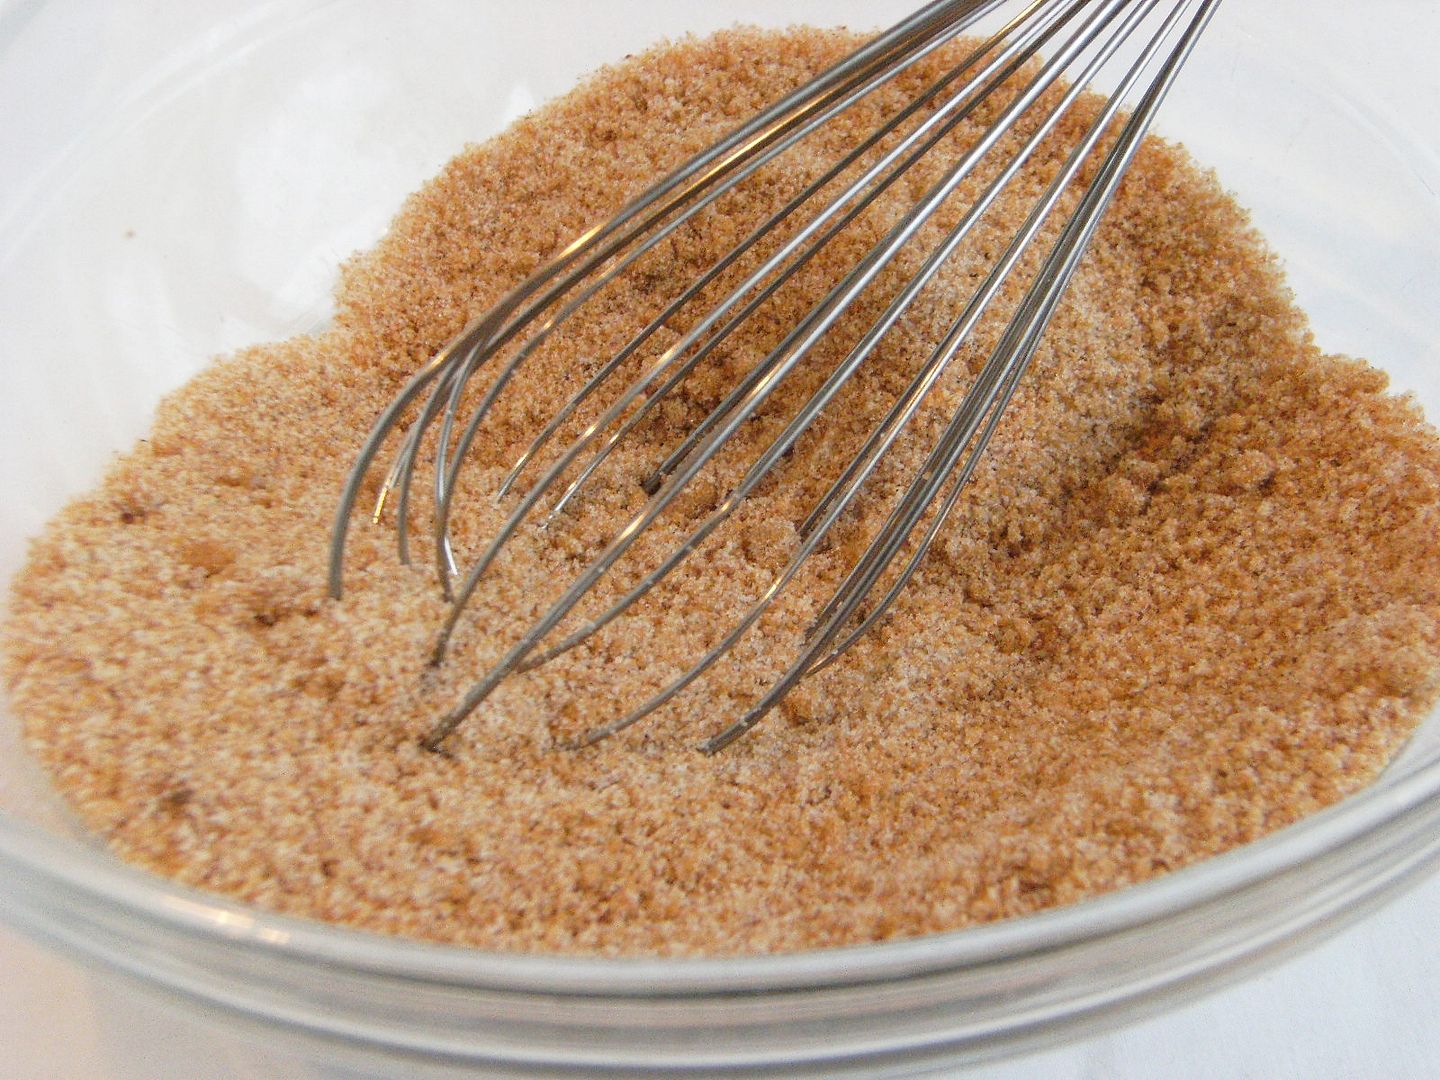
In a medium-sized bowl, whisk all dry ingredients until thoroughly blended. Be sure to break up any lumps from the brown sugar or spices.

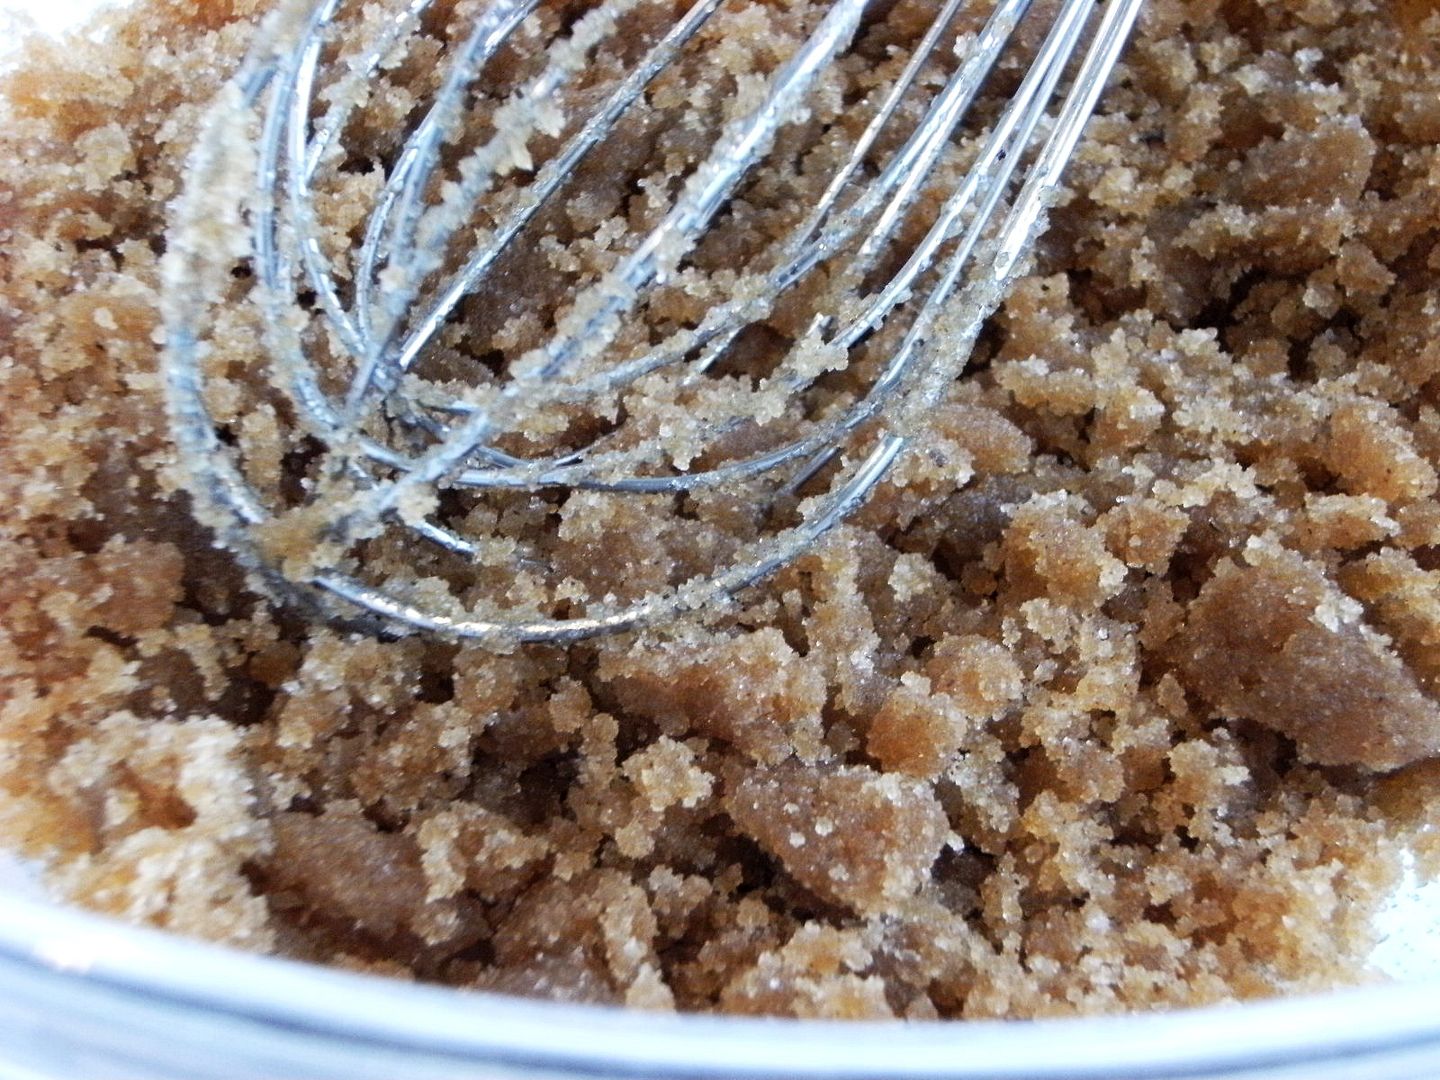
Stir in the almond oil. Spoon into the glass container and secure with lid.

How simple is that? And if you are like me, you already have all the ingredients at your fingertips with the exception of the almond oil. I have a feeling you could easily find almond oil at your local health food store, or perhaps even at Michaels. I'd like to try to get my hands on some soon to whip up a big batch of this scrub--some to give away and some to keep, of course!

Stay tuned as the Twelve Days of Christmas continue with many more fantastic handmade gift ideas.

All photos are from Bake at 350.

Sunday, November 29, 2009

The Start of My Christmas Baking

Aren't these gingerbread tealight holders absolutely festive and gorgeous? These are from Na Miotle and I think they are stunning. I would have never thought of making gingerbread candleholders but now I am dying to make these. Wouldn't they be the perfect addition to a holiday tablescape? I think there is something so traditional and magical about them. There are lots of gorgeous, creative Christmas baking projects over at Na Miotle.

Speaking of holiday baking, I baked my first batch of Christmas cookies late last night! I made my absolute favorite Christmas cookies from childhood and they were just as delicious and addictive as I remember.

The recipe comes from Taste of Home. I remember stumbling upon this recipe in Taste of Home magazine with my mother when I was little. I used to search through the magazines with her to see who could find the hidden toothpick first. :) I cannot remember how old I was when we first made these cookies, but I remember how I instantly loved them and begged for them every year since.

The recipe, White Velvet Cutouts, is essentially a soft sugar cookie with a slight tang from the addition of cream cheese in the batter. They bake up beautifully and don't spread too much as there is no leavening agent in the batter. They make for a beautiful presentation as they bake until just set but not brown (personally I hate a sugar cookie with a golden bottom).

The soft texture and unique flavor of these cookies make them memorable and utterly addictive. I really and truly think I may abandon all other sugar cookie recipes now that I have this one in my repertoire. The recipe includes a simple buttercream frosting which sets up just enough to allow the cookies to be stacked but is still soft and inviting. The cookies aren't overly sweet because of the cream cheese so the frosting adds a welcomed extra sweetness, though they are perfectly delightful without the frosting!

My mother and I always skipped chilling the dough and used a cookie press to shape the cookies for a Spritz Cookie-like effect. Since I don't have a cookie press of my own, I decided to follow the recipe and roll/cutout my cookies. I made a few different shapes but decided these trees were the cutest. I decorated the large trees by spreading the icing out on the cookie and adding a few sugar pearl "ornaments." I thought spreading the icing out evenly was a bit too tedious (I didn't start decorating the cookies until 2 or 3 am and was very tired), so I decided to pipe little star "branches" on the smaller trees.

I rolled and cut my entire batch last night but still have all the scraps from the first roll in the fridge, so I have lots of cookies in my future! It's a good thing too, because between my husband, the six friends he had over today, and myself, there are only a few of the original cookies left! They are that good, folks.

So if you have an opening in your holiday baking schedule, I highly suggest you try these cookies! I'm fairly certain they'll become a favorite and a tradition in your own family.

White Velvet Cutouts
adapted from Taste of Home

2 cups unsalted butter, softened
1 (8 oz.) package cream cheese, softened
2 cups sugar
2 egg yolks
1-1/2 teaspoon vanilla extract
4-1/2 cups all-purpose flour

Buttercream Frosting:
3-1/2 cups confectioners' sugar, divided (I sifted mine as well)
4 tablespoons butter, softened
1/2 teaspoon vanilla extract
3 to 4 tablespoons milk, divided (I ended up using 5)
food coloring, optional

In the bowl of an electric mixer, cream butter and cream cheese until light and fluffy. Add sugar, egg yolks and vanilla; mix well. Gradually add flour. Cover and chill 2 hours or until firm.

Roll out on a floured surface to 1/4-inch thickness. Cut into 3-inch shapes; place 1 inch apart on parchment lined baking sheets. Bake at 350 for 10-12 minutes or until set (not browned). Cool 5 minutes; remove to wire racks to cool.

For frosting, combine 1-1/2 cups sugar, butter, vanilla and 3 tablespoons milk in the bowl of an electric mixer; beat until smooth. Gradually add remaining sugar; beat until light and fluffy, about 3 minutes. Add enough remaining milk and food coloring (if using) until frosting reaches desired consistency. Frost and decorate cookies.

Yield: about 7 dozen cookies.
Related Posts Plugin for WordPress, Blogger...

Share Buttons