Saturday, February 27, 2010
Long + Bold
I created this new cameo necklace a couple of days ago. I just love long and bold cameo necklaces. They feel so retro and whimsical. I'm working on several similar designs with floral and woodland cameos for spring. I'll be taking this beauty to Street Scene in Lexington in a couple weeks when I restock my designs.
Friday, February 26, 2010
On the Menu
Today's lunch consisted of left over White Bean Turkey Chili with a Black Bean and Guacamole Burrito. I made the burritos for dinner last night and they were seriously the best burritos I've ever eaten (even better than Qdoba--though, admittedly, I am partial to their nachos). I filled whole wheat tortillas with cilantro lime brown rice, homemade guacamole, and a mixture of red onion, garlic, japaleno, tomato, corn, black beans and lots of spices. I topped them off with a sprinkle of fat free cheddar cheese and browned them in a cast iron pan. So good! And I'm officially addicted to homemade guacamole. It had such a bright, fresh flavor. I'll be making these burritos again soon, for sure!
Thursday, February 25, 2010
White Bean Turkey Chili
Last night I made the most delicious (and healthy) White Bean Turkey Chili. I've been working on cooking up low-fat meals full of veggies and whole grains with the occasional addition of lean protein and salmon. I have been trying out new recipes and really relying on fresh produce and lots of herbs and spices for flavor. It's been one delicious adventure.
This White Bean Turkey Chili was seriously fantastic. I slightly adapted/halved this recipe from one of my favorite food blogs for healthy recipes. I topped the finished chili with a sprinkling of fat free cheddar cheese and chopped cilantro. The fresh cilantro really took this chili to a whole new level, giving it such a bright, complex flavor. This is a great way to enjoy comfort food without weighing yourself down. Of course, if you aren't concerned about calories/fat, you could use reduced or full fat sour cream and cheese.
White Bean Turkey Chili
adapted from Gina's Weight Watcher Recipes
serves 4-6
1 tablespoon olive oil
1 small onion (or 1/2 of a large onion)
3 cloves of garlic
1 lb. ground turkey breast
1 teaspoon chili powder, or more to your taste
1 bay leaf
1 tablespoon cumin
1 teaspoon oregano
1 teaspoon red pepper flacks, or more to your taste
2 (16 oz.) cans of cannellini beans, drained and rinsed
1 1/2 cups fat free chicken broth
1/4 cup fat free sour cream
salt and pepper, to taste
Heat a large heavy bottomed pot over medium heat. When hot, add olive oil followed by the onions and garlic; saute about 5 minutes or until onions begin to turn translucent. Add ground turkey and cook, breaking up the meat, until white, about 5 minutes. Add salt, pepper, chili powder, cumin, oregano, and red pepper flakes; cook for 2 minutes. Add beans and broth and cook uncovered about 10 minutes.
Lower the heat and cover. Simmer about 45 minutes, mixing occasionally. Add sour cream and cook 5 more minutes. Adjust seasonings and salt to taste.
Top with fresh cilantro, fat free cheddar cheese, and fat free sour cream, if desired.
Enjoy!
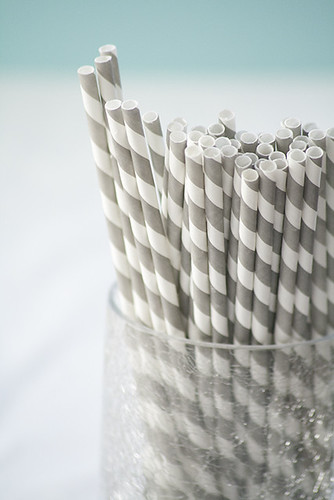
Currently Loving... Paper Straws
Photos from hungrygirl* on Flickr.
I am currently loving the adorable look of paper straws! These simple little straws add such a fun, vintage whimsy to any beverage. I may just have to order some asap!
Tuesday, February 23, 2010
Recipe Makeover Part 2
Last night I posted about how I was working on giving Martha's Banana-Walnut Chocolate Chunk Cookies a healthy makeover. I am happy to report that the makeover was a success and the healthier version is absolutely delicious, so I am back to share the adapted recipe. As I mentioned in my last post, the biggest changes I made to the recipe were to replace all the butter in the recipe for unsweetened applesauce, up the amount of whole wheat flour, and add a heaping teaspoon of cinnamon for more flavor. Texturally the resulting cookie was much softer and more cake-like than the original cookie. I actually found the new texture extremely satisfying and a perfect change as I was aiming to create a treat ideal for breakfast.
I am interested in trying a few more changes with these cookies. Next time I think I will reduce the amount of chocolate chips in the recipe and replace them with more walnuts for added texture. For those who enjoy raisins (I am not among the raisin fans of the world), you could also replace the chocolate chips with raisins for an even healthier cookie. I'm also curious about possibly adding some whole or ground flax seeds to the cookie for some omega-3 goodness. Cookies are very forgiving, so I'm sure you could play around with additions or replacements to your heart's content.
I wrapped my cookies tightly, 2 at a time, in plastic wrap and placed them inside a Rubbermaid container to store in the freezer. Portioning them and freezing them makes for a quick breakfast or snack. Simply grab a few cookies from the freezer and let them defrost at room temperature or warm them in the microwave for 10-20 seconds, until warm and the chocolate chips are nice and gooey. Yum!
Banana-Walnut Oatmeal Chip Breakfast Cookies
adapted from Martha Stewart
makes about 30 cookies
1 1/4 cups whole wheat flour
1/2 cup all-purpose flour
1 teaspoon salt
1/2 teaspoon baking soda
1 heaping teaspoon ground cinnamon
3/4 cup unsweetened applesauce (2 individual Mott's applesauce containers)
1/2 cup granulated sugar
1/2 cup packed light-brown sugar
1 large egg
1 1/2 teaspoons vanilla extract
1/2 cup (1 large) mashed ripe banana
1 cup old-fashioned rolled oats
1 cup semisweet chocolate chips
1/2 cup coarsely chopped walnuts
Preheat oven to 375 degree. Whisk together flours, salt, baking soda and cinnamon in a small bowl; set aside. Put applesauce and sugars into the bowl of an electric mixer fitted with the paddle attachment; mix on medium speed until fully combined. Reduce speed to low. Add egg and vanilla, mix until incorporated. Thoroughly mix in mashed banana. Add flour mixture, mixing until just combined. Stir in oats, chocolate chips, and walnuts.
Using a 1 1/2-inch cookie scoop (I used this scoop), drop dough onto baking sheets lined with parchment paper, spacing about 2 inches apart. Bake cookies, rotating the sheets halfway through, until golden brown and just set, 12 to 14 minutes (mine took 14). Let cool on sheets 5 minutes then transfer them to wire racks to finish cooling. Cookies can be stored in an airtight container up to 2 days or can be tightly wrapped and frozen for up to 2 weeks.
I thought I'd share a few new (old) additions to my kitchen. I found two darling vintage daisy canisters and a set of eight fantastic mugs while doing some thrift shopping this past weekend with a friend. I also picked up a set of three white lotus bowls which I have been dying to have! You can see a peak of one of them next to the daisy canister.
As you can see, I am currently using the smaller canister to hold packets of sweetener. The larger is being used as a vase. They will probably end up in my studio holding thread or other sewing snippets.
I am crazy about the colors in these printed mugs. The set of eight had two different prints in these same colors, the bird print you see here and a cute print with little houses. I'll share a photo of the other print soon.
I've been keeping fresh flowers around the house frequently since Christmas. I bought these flowers on Sunday to brighten up the kitchen. The bouquet is such a springy color palette, soft purples and greens with a hint of yellow and pink.
Monday, February 22, 2010
Recipe Makeover
I currently have a batch of cookies in the oven. In an attempt to eat healthier while still enjoying my love for baking, I am working on making over some of my favorite recipes. Last spring I made Martha's Banana-Walnut Chocolate Chip Cookies and absolutely loved them! I've been meaning to make them again ever since with the intention of replacing the butter in the recipe for applesauce and trying a few other changes to make the recipe healthier. I have high hopes that with some adjustments this could make one stellar breakfast cookie. My version is packed with whole wheat flour and oatmeal, relies on applesauce as a butter replacement, and gains some extra flavor with a heaping teaspoon of ground cinnamon. I'll post the revised recipe tomorrow if they turn out well!
Saturday, February 20, 2010
Truly Madly Deeply
I have found my dream couch. I am seriously in love, folks. I may or may not be contemplating selling a kidney so I can purchase this beauty. I would design my next studio space around this amazing couch. Is this not the greatest thing you've ever seen?! I know it's almost borderline tacky (and may very well be tacky to some), but I think it works and I love it! I have a feeling she's going to show up in my dreams tonight.
Friday, February 19, 2010
A Formal Affair
This is a new necklace I created a few evenings ago. I love how it's dainty and bold at the same time. The necklace has already been spoken for, but I'm going to order more pearls and then I'll have the necklace available with this wine colored rose as well as with a very subtle pink rose. It will be available in sterling silver (as shown) and also in 14K gold-fill.
Monday, February 15, 2010
Jane Market Bag v2.0
After sewing my first Jane Market Bag last May, I've been meaning to sew a few more ever since. My collection of fabric was rather small and I didn't have enough fabric to sew another bag until a trip to Jo-Ann Fabric a couple of months back. After picking up enough fabric for a few of these fantastic bags, I was ready to get to sewing. Sort of. My first market bag ended up a little bit smaller than Alicia Paulson's pattern since I was short on fabric. This time I decided to go larger than the original Jane Market Bag. I have this fantastic shopping bag that the hubby picked up at a career far on campus; it holds so much without being too big. I decided to measure that bag and then adjust the dimension of the Jane Market Bag accordingly. This took quite a bit of planning as I checked and rechecked the calculations on my new dimensions. Unfortunately after figuring out my new pattern and starting to cut the fabric to size, I got distracted a few months back and all but abandoned the project. This weekend I finally picked it back up and finished my darling bag. The result is a pleasantly roomy bag which I cannot wait to fill up with flour and sugar and all sorts of baking essentials!
I have certainly rekindled my love for sewing. I will be making another one of these bags sometime in the future, though I think I may try few other sewing projects first. I'm dying to attempt a cute little clutch.
I took a ton of photos of the finished bag. One of the fantastic things about the pattern is that there are so many great topstitching details which really make the bag. I decided to further decorate my bag by adding two rows of vintage rick rack along the front and back pockets. I also created an insert for the bottom of the bag using left over fabric and some super stiff interfacing that I used in the sign I made for my show booth. I love how sweet and girly these colors are together and the apples and pears fabric is one of my favorite prints.
Sunday, February 14, 2010
Polka Dots and Rick Rack
Another little look at what I've been working on this weekend. I am hoping to finish sewing tonight so I can share photos of the completed project tomorrow. I just love the colors together! And you can never go wrong when polka dots and rick rack meet. It's nice to finally put to use some of the vintage trim I have accumulated. I have a large box full of amazing vintage rick rack, seam binding, lace and trim. It's one of my favorite things.
Saturday, February 13, 2010
Saturday Sewing
I'm spending my Saturday afternoon casually in the studio, listening to my favorite girly music and working on a little sewing project. It's been a while since I actually made something for myself and I really want to get back into the routine of using my nights and weekends for non-work related projects.
I'll post finished photos of my little sewing project later.
Happy Saturday!
Friday, February 12, 2010
Making Whoopie (Pies) for Valentine's Day
A couple of nights ago I made these heart shaped Red Velvet Whoopie Pies. I used this recipe and they were quite good, though not my favorite. I made the most delicious whoopie pies ever last Sunday for the Super Bowl. They were Chocolate Whoopie Pies which I filled with an Orange Cream Cheese Frosting. Absolutely to die for! I'll post photos and the recipe for them soon.
Wednesday, February 10, 2010
Modern + Feminine
I love this frosted doily mirror tutorial from Paper N Stitch. It reminds me of this frosted lace edged mirror I had from IKEA. Unfortunately it got broken in transit to an art show last summer. I've recently seen some really great projects using frosted glass finish spray and I'm curious about picking up a bottle of my own to experiment with.
Tuesday, February 9, 2010
A Few Flowers
I listed a few pairs of new earrings in the shop tonight! The first pair is a bit more vibrant than my usual color palette, but I think they are playful and perfect for the spring and summer weather so many folks are craving lately.
Click the images to go to the listings.
Thursday, February 4, 2010
Cameo Necklaces
I added two new cameo necklaces and a couple pair of earrings to the shop this afternoon. I am hoping to add several more items tomorrow.
Subscribe to:
Posts (Atom)