Showing posts with label crafting. Show all posts

Monday, January 13, 2014

New Years Resolutions

I've been quiet around the blog the past couple of weeks, but I'm back today and I wanted to share a little bit about my goals for 2014.  I'm not normally one to make a big fuss about New Years, setting some unattainable resolution(s) on January 1st, only to fail or forget about them before spring even arrives.  While I don't plan to make any bold, set-in-stone resolutions for 2014, I do have some modest, general goals that I've set for myself.

I feel like I'm in a sort of transitional period in my life.  I'll be turning 27 this year, finally feel like a bonafide adult, and am feeling the pressure to accomplish a few things that are important to me before I hit the big 3-0.  Naturally there are a few goals I'd like to meet this year to nudge me along the path to being the successful woman I'd like to become.

In general, I'm going to wholeheartedly focus this year on growing my jewelry business and this blog.  While I've been running a business since 2006 and this blog since 2008, I've really let my shyness and insecurities hold me back from going places over the years.  While working on the shyness is going to be a lifelong process, I have resolved to be more diligent with updating my online shop, posting here on the blog, and generally giving my businesses my all.

I started working with a graphic designer last fall to brand my businesses and create a new website/blog.  While the work isn't entirely in my hands, I'm hoping the whole process will be complete before year's end.  I think the pick-me-up in branding will help establish a recognizable look for my business and blog and create a more professional appearance overall.

This year I'm making some investments to expand my skills and to improve my craft.  After years of wanting to take up metalsmithing, I've finally splurged on some of the basic tools I needed to do so.  I'm also in the process of learning mold-making and resin casting so I can begin reproducing the vintage flowers that I so dearly love to use in my designs.  These are two new skills that I've wanted to learn for some time, but I'm thrilled to finally take the leap.  As these new skills elevate my work, I'm going to apply for a few more prestigious art/craft shows this year.

As far as life in general is concerned, I'm hoping that I can make some advancements this year in being a more organized, productive person overall.  Again, no set-in-stone resolutions as far as this is concerned, but I'd like to feel a little more put together come 2015.


I can already say I'm well underway working on accomplishing my "learn to metalsmith" resolution.  I've started making some simple, slim sterling silver textured stacking rings which are now available in my Etsy shop for purchase.

These sterling silver stack rings have really sparked a major passion and I'm excited to learn more techniques in metal.  I hand form, solder, hammer, and polish each of these rings by hand.  The entire process is utterly thrilling and addicting.  As I'm able, I plan to expand my collection of metalsmithing tools so I can continue to explore new techniques and projects.  This is just the beginning!


I'd love to know what you goals and resolutions are for 2014.  Any tips on staying motivated when your resolutions are less-than fun?

Wednesday, September 4, 2013

New Items in my Etsy Shop!


It's been a while, but I've started updating my Etsy shop again.  I finally have a setup that I'm happy with, which makes taking photos for my shop much easier and more enjoyable than before.  I'm trying to jump full force into my jewelry business this fall and I hope to have my shop full of items, with consistent new listings at least a couple of times a week, by the beginning of November.

I have a few art/craft shows lined up over the coming months as well, and I'll be sharing those dates on the blog soon for any local folks who might be interested.

It feels good to be back in the swing of things!

Tuesday, November 27, 2012

Cyber Week Sale!

I'm a little late announcing the Cyber Week Sale in my Etsy shop here on the blog, but better late than never, right?

Until midnight EST on Monday, December 3rd, enter the Coupon Code "CYBERWEEK2012" during Etsy checkout to receive 20% off your order.  I'm also offering free shipping for all US orders this week as well.  It's a great time to do a little holiday shopping for yourself or loved ones!

Happy shopping!


Wednesday, July 4, 2012

Happy Fourth of July!

I hope you all have a safe and happy Fourth of July.  I've been busy preparing our little home for what is becoming our annual Fourth of July party.  Unfortunately, due to the crazy heat and lack of rain we've been experiencing in our part of Kentucky, all personal fireworks have been banned so it looks like we'll be celebrating the holiday with water instead of fire.  Husband purchased an obscene amount of fireworks before the personal firework ban was announced, so we'll be hosting another party in the future once the ban has been lifted so we can enjoy them.

I made my very first wreath, a festive flag wreath following this tutorial, and am excited for it to welcome our guests today.

I hope you all enjoy a wonderful day with friends and family!

Tuesday, March 30, 2010

Ruffled

In the middle of my preparations for upcoming art fairs, I am frantically trying to redesign my booth setup for the season. I created my own fitted tablecloths last year, but after a full show season, they are ready to be retired. This year, I am thinking RUFFLES!

I have been obsessed with the image of the crisp white ruffled tablecloth with sunny yellow accents from Country Living since I first saw it earlier in the month. I love how fresh and cheerful it is while being utterly and perfectly feminine! I'm torn about the white; however, since I'm not sure how practical a white tablecloth would be for one outdoor event after another. Though, on the other hand, I have heard that white is really the best color for items that see a lot of use since they can be easily bleached or OxiCleaned back to their original beauty. I am smitten with the idea of a clean white tent, gorgeous white ruffled tablecloths and various candy-colored pastel accents. I currently have all my display pieces colored bright white, but it would be so fun to change a few to sunny yellow or aqua or petal pink for a bit of playful interest.

The next tablecloth inspiration was handmade by Andrea Singarella of Everyday Beauty. She repurposed a ruffled shower curtain to create this adorable tea-stained tablecloth. The more ruffled tablecloths I see, the more convinced I am that this is the look I am going for this year with my display. I have a feeling it is going to be a real pain to sew two six-foot by three-foot floor-length ruffled tablecloths entirely from scratch. I'm afraid sewing them from scratch is my only option to keep the cost low and to get the perfect fit I desire. If anyone has any cost-effect yet time saving tricks, please send them my way!

Monday, February 15, 2010

Jane Market Bag v2.0

After sewing my first Jane Market Bag last May, I've been meaning to sew a few more ever since. My collection of fabric was rather small and I didn't have enough fabric to sew another bag until a trip to Jo-Ann Fabric a couple of months back. After picking up enough fabric for a few of these fantastic bags, I was ready to get to sewing. Sort of. My first market bag ended up a little bit smaller than Alicia Paulson's pattern since I was short on fabric. This time I decided to go larger than the original Jane Market Bag. I have this fantastic shopping bag that the hubby picked up at a career far on campus; it holds so much without being too big. I decided to measure that bag and then adjust the dimension of the Jane Market Bag accordingly. This took quite a bit of planning as I checked and rechecked the calculations on my new dimensions. Unfortunately after figuring out my new pattern and starting to cut the fabric to size, I got distracted a few months back and all but abandoned the project. This weekend I finally picked it back up and finished my darling bag. The result is a pleasantly roomy bag which I cannot wait to fill up with flour and sugar and all sorts of baking essentials!

I have certainly rekindled my love for sewing. I will be making another one of these bags sometime in the future, though I think I may try few other sewing projects first. I'm dying to attempt a cute little clutch.

I took a ton of photos of the finished bag. One of the fantastic things about the pattern is that there are so many great topstitching details which really make the bag. I decided to further decorate my bag by adding two rows of vintage rick rack along the front and back pockets. I also created an insert for the bottom of the bag using left over fabric and some super stiff interfacing that I used in the sign I made for my show booth. I love how sweet and girly these colors are together and the apples and pears fabric is one of my favorite prints.


Sunday, February 14, 2010

Polka Dots and Rick Rack


Another little look at what I've been working on this weekend. I am hoping to finish sewing tonight so I can share photos of the completed project tomorrow. I just love the colors together! And you can never go wrong when polka dots and rick rack meet. It's nice to finally put to use some of the vintage trim I have accumulated. I have a large box full of amazing vintage rick rack, seam binding, lace and trim. It's one of my favorite things.

Saturday, February 13, 2010

Saturday Sewing


I'm spending my Saturday afternoon casually in the studio, listening to my favorite girly music and working on a little sewing project. It's been a while since I actually made something for myself and I really want to get back into the routine of using my nights and weekends for non-work related projects.

I'll post finished photos of my little sewing project later.

Happy Saturday!

Wednesday, February 10, 2010

Modern + Feminine


I love this frosted doily mirror tutorial from Paper N Stitch. It reminds me of this frosted lace edged mirror I had from IKEA. Unfortunately it got broken in transit to an art show last summer. I've recently seen some really great projects using frosted glass finish spray and I'm curious about picking up a bottle of my own to experiment with.

Monday, December 14, 2009

Day 5: Handmade Holiday Gift Ideas

The project for Day 5 of my Twelve Days of Christmas: Handmade Holiday Gift Ideas comes from Disney of the lovely blog Ruffles & Stuff. If you are familiar with Ruffles & Stuff, you know about all the fantastic projects Disney dreams up! Disney's skill to transform objects from bland to fabulous are seriously inspirational! These "Granny Chic" Slippers are one of my favorite creations she has come up with. Starting off with simple ballet slippers you can get from Wal-Mart or pretty much any department store, you can create a truly fabulous and feminine gift! Disney's tutorial shows how to cut out and form gorgeous fabric flowers which are simply sewn onto the slippers. All the steps for cutting, forming and sewing the flowers can be found on her tutorial and they are so simple anyone with a pair of scissors, a needle and some thread could follow them. No prior sewing experience is needed to create these gorgeous slippers.

If you wanted to simplify the project even further, you could pick up some pretty felt or crocheted flowers from the craft section of Wal-Mart or from any craft store. You could simply buy a few flowers to coordinate nicely with the color of the slippers you pick out and sew the pretty ready-made flowers onto the slippers. Talk about a fast and inexpensive gift idea!

I think these are gorgeous and girly. With winter ahead, wouldn't it be nice to give such a warm and cozy gift?

Appliqué Your Way Giveaway


I wanted to share that there is a giveaway going on over at Nice until December 18th to win a copy of Kayte Terry's Appliqué Your Way. I've been wanting to start a little collection of various craft books and the sort. My current collection is rather sad and only consists of Alicia Paulson's Stitched in Time (which is fantastic, by the way). Appliqué Your Way is on my current wish list and with contributors such as Caitlin (of Nice), it's sure to be a great collection of projects!

Friday, December 11, 2009

Day 4: Handmade Holiday Gift Ideas

All photos are from Sarah of The Small Object.

Day 4 of my Twelve Days of Christmas: Handmade Holiday Gift Ideas is another little project from Amanda of Bake it Pretty. Vintage buttons are all the rage and with so many folks collecting buttons these days, they make a gorgeous gift. Brightly colored vintage buttons in all sorts of shapes and styles look lovely on display in a glass container or worn colorfully on a sweater or blouse. But I imagine you never thought to consume them... until now! You see, those pretty buttons above are actually candy. They are so simple to make with the aid of a chocolate mold and they make fantastic gifts when packaged whimsically.

Amanda has a great tutorial on her blog with directions on how to use the chocolate molds and other ingredients (all of which can be found in the Bake it Pretty online shop) to make these precious little treats. You can make these buttons in all the colors of the rainbow and you can even add candy flavorings to make them in all sorts of playful color/flavor combinations.

Amanda even created the most charming little printable packaging (click for Amanda's printable PDF) you can staple to the buttons you bag up as gifts. Isn't that the cutest thing ever? While these look like something you'd find in the most charming confiserie, they are quite simple to make using Bake it Pretty products and Amanda's gorgeous tutorial.

I purchased a chocolate button mold of my own and several colors of candy melts and I can't wait to make little bags of buttons for my friends this holiday! I also bought several other chocolate molds--a few in particular that I am so excited about--and I plan to share my candy making adventures with you as soon as I receive everything and put them to use!

I can't wait!

Wednesday, December 9, 2009

Day 3: Handmade Holiday Gift Ideas

The third Handmade Holiday Gift Idea comes from Amanda of Bake it Pretty. These cupcake ornaments are super cute and can be customized to all sorts of beautiful colors. These would look so retro and festive on a white or pink tree! I'd love to make a few to place around my kitchen even after the holidays. Grouped together on a pretty cake stand, as in the photo above, these would be a darling centerpiece for a holiday gathering. Sparkly and whimsical, these would make great little stocking stuffers or small gifts. Amanda even suggests using mini versions as decorations for presents themselves! In the spirit of my Handmade Holiday Gift Ideas, these ornaments require a manageable list of supplies and are super simple to create!

Check out Amanda's post on the Bake it Pretty blog for a list of the supplies you will need as well as a full step-by-step tutorial on how to craft these sweet treats!

Tuesday, December 8, 2009

Laundry Just Got a Whole Lot Cuter!

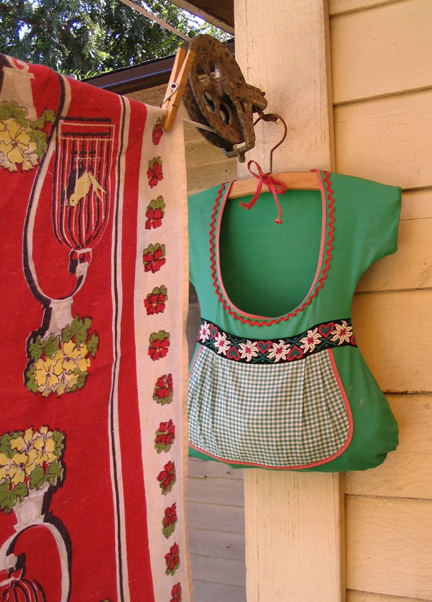
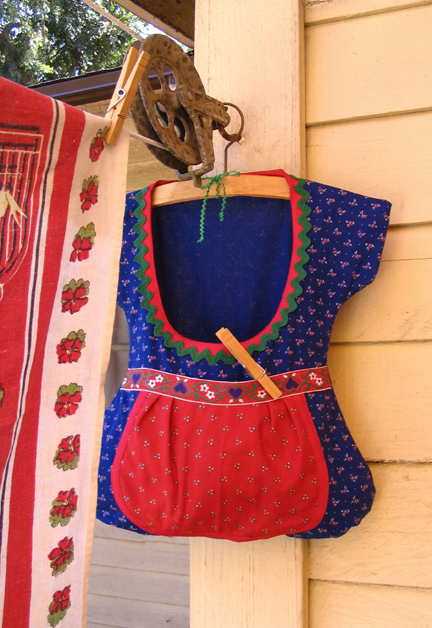
In hunting for more great handmade gift ideas, I happened upon a pattern inspired by this amazing vintage clothespin holder. The project comes from Hannah of Made With Love By Hannah and is so unbelievably adorable I squealed! I mean, seriously, how cute is that clothespin holder? I don't think I've happened upon anything this quite darling for some time.

Hannah's post provides a material list, printable pattern and a few step-by-step photos of the project. While I have never been terribly fond of line dried clothing (is it just me or do they become itchy and stiff?), I'd love to find a use for one of these darling holders. I am seriously smitten.

Here is the clothespin holder that Hannah created from her original vintage treasure. I love her choice of folkish fabrics. Perhaps I'll find something around my studio that could be stored in one of these adorable holders...

Monday, December 7, 2009

Day 2: Handmade Holiday Gift Ideas

The second post in my series The Twelve Days of Christmas: Handmade Holiday Gift Ideas is an idea that was inspired by a project from Martha Stewart. Martha Stewart provides a very pretty tutorial on a great way to incorporate recycling in your handmade gifts. Martha's tutorial suggests reusing remnants of old candles, which I think is a great idea! I just hate it when I have a fantastic candle that, for whatever reason, doesn't burn all the way to the bottom of the wick. It's quite easy to collect scrap candle bits for this project if you are like me and burn candles often. You can simply collect the extra bits throughout the year, keeping them in a ziplock bag until you are ready to melt them down and give them new life.

If you don't have any old candle bits laying around, don't fear. I didn't last Christmas when I decided to make some teacup candles of my own. Instead you can quite easily find great candle supplies at stores such as Michaels. They carry large containers of microwavable soy wax which makes creating these teacup candles a total breeze (a lot easier than the Martha Stewart version, if you ask me). Following the directions on your wax, you can simply microwave it in a glass container--I suggest a large glass measuring cup to make pouring the melted wax into your teacups easier--and once the wax is melted you may add any scents or dyes that you'd like. Wicks, scents and dyes can be found along side the microwavable soy wax in your local craft store. This is where you can really customize the candles! Pick your preferred scent and you could choose to leave the candles white or dye them to match the colors of your teacups. The teacups themselves could be new, or you could search second hand shops such as Goodwill for some great vintage ones! I found some pretty vintage teacups with a simple Asian-inspired design last winter when I made these candles. They were quite cute! Once you have your wax melted, scented and dyed, you are ready to pour the wax into your chosen vessel. Martha Stewart provides a helpful hint of using wooden skewers to help suspend your wick properly in your teacup while you pour the wax and wait for it to harden. After you pour the wax and it hardens completely, you are ready to trim the wick and package your pretty little gifts! I think these would be absolutely darling packaged in little cupcake boxes!

This project is as simple as choosing your teacups, purchasing your candle supplies, microwaving, stirring and pouring! The simplicity of this project is unbelievably when compared to the elegance of the finished product. You could easily make several of these in an hour. Just think how sweet it would be to present a lovely teacup candle to each of your girl friends! They are so chic and remind me of something you'd find at Anthropologie.

If you decide to purchase second hand teacups, or even use some old ones you may have around the house, this gift idea can be quite inexpensive! I believe my soy wax, wicks and chosen scent (vanilla, please) came in under $10. Also, might I note that there are always 40% off coupons for Michaels floating around online. I found my teacups at Goodwill for around $1 each. I was able to make 4 teacup candles with a single container of soy wax. The teacup candles are a really fun, feminine gift! And as an added bonus, after the recipient burns their candle they will have a pretty new teacup to add to their collection.

Thursday, December 3, 2009

Lace and Lights

How seriously gorgeous is this Paper-Doily Wreath from Martha Stewart? I just love how whimsical and feminine it is! I think it would even be pretty for non-holiday decor. There are tons of wreath projects over at Martha Stewart. Unfortunately I won't have any time this holiday season to craft one of my own, but for those who do, there are all sorts of beautiful wreaths to be inspired by.

Wednesday, December 2, 2009

Day 1: Handmade Holiday Gift Ideas

I decided to start a little series The Twelve Days of Christmas: Handmade Holiday Gift Ideas. From now until Christmas I will share with you twelve of my favorite handmade holiday gift ideas that anyone--even the most craft challenged individual--could create. A little encouragement to motivate everyone to get in the spirit of giving handmade this holiday season.

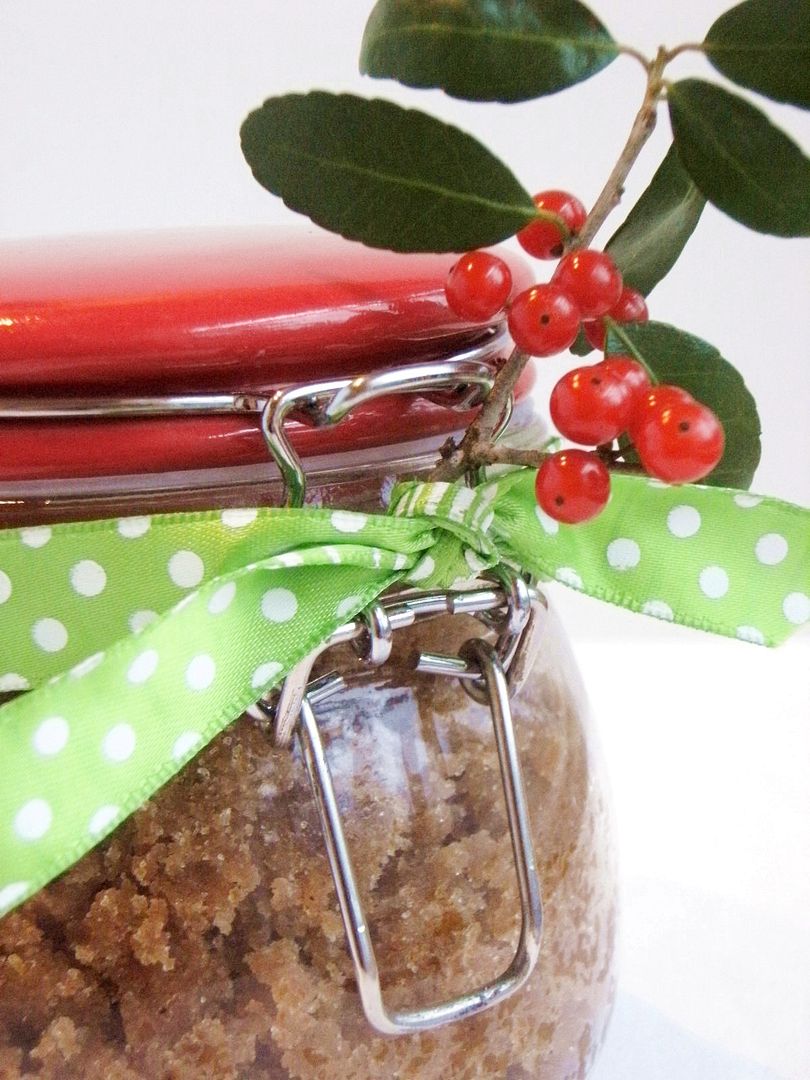
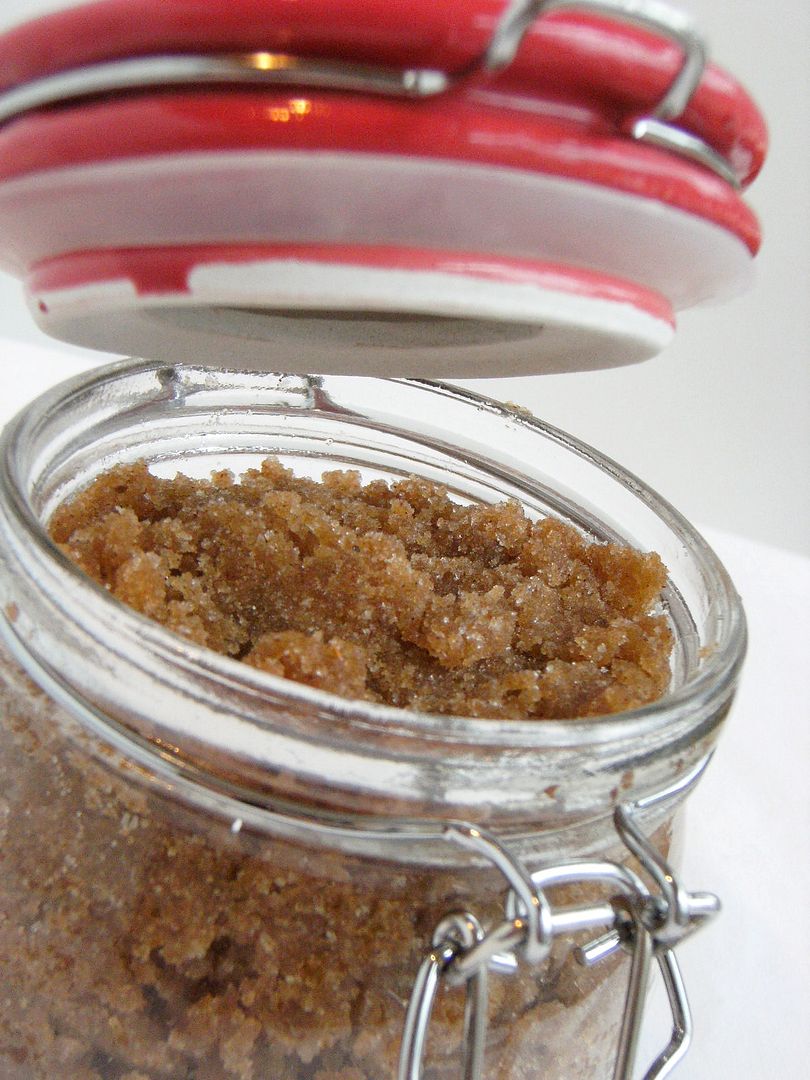
When I saw a post by Bridget of Bake at 350 for this Brown Sugar and Spice Body Scrub and immediately fell in love! I love giving handmade gifts for the holidays and this scrub would make a fabulous present for all the girly girls in your life. You could easily whip up a big batch of this scrub, separate it out into pretty little containers, and have one to give to each of the beautiful women you know.

Doesn't that just look divine? What woman doesn't love pampering herself with luxurious bath and body products! I have been so impressed with all the beautifully packaged bath & body products that have popped up all over Etsy the past couple of years. There are now so many great options for all-natural beauty products. Many of the great products we all love can easily be whipped up in an afternoon after procuring a few ingredients. When packaged lovingly with sweet little handmade labels and a decorative accent or two, these homemade treats make great gifts!

The recipe for this Brown Sugar and Spice Body Scrub seriously could not be any easier! It could be effortlessly doubled, tripled, quadrupled... to make a large batch for multiple recipients.

The recipe comes from C & H Sugar and is part of a great selection of homemade gift ideas.

For a single batch you'll need:
1 cup light brown sugar
1 cup pure cane sugar
3/4 cup almond oil
2 tsp. cinnamon
2 tsp. ginger
2 tsp. nutmeg
16oz. glass container with lid

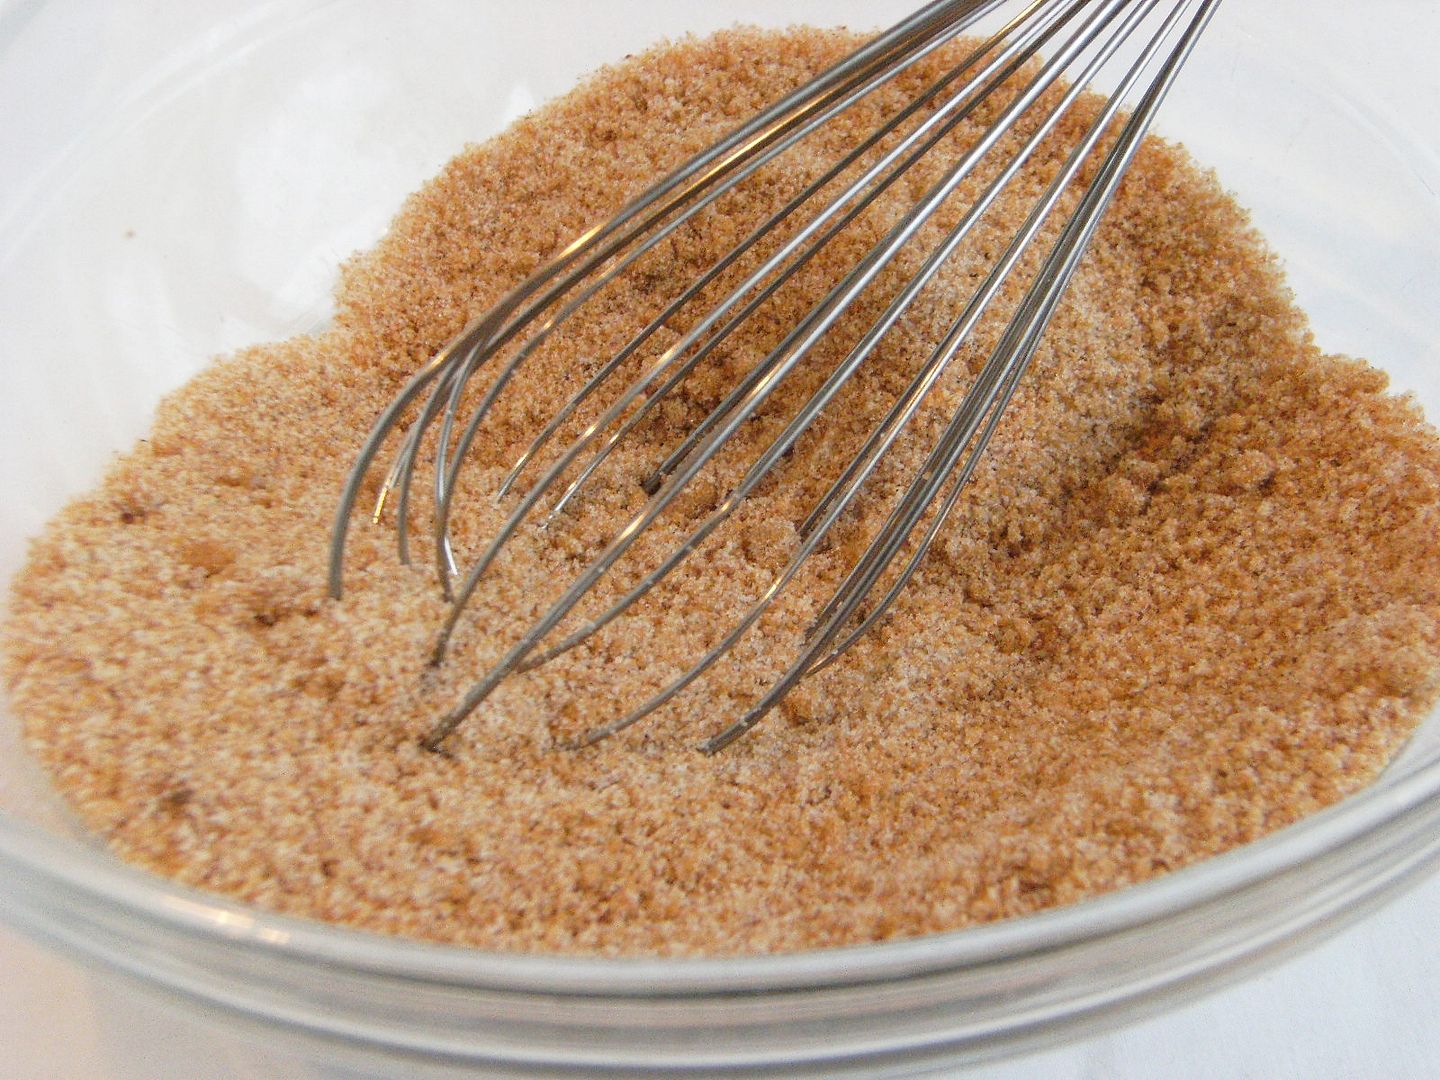
In a medium-sized bowl, whisk all dry ingredients until thoroughly blended. Be sure to break up any lumps from the brown sugar or spices.

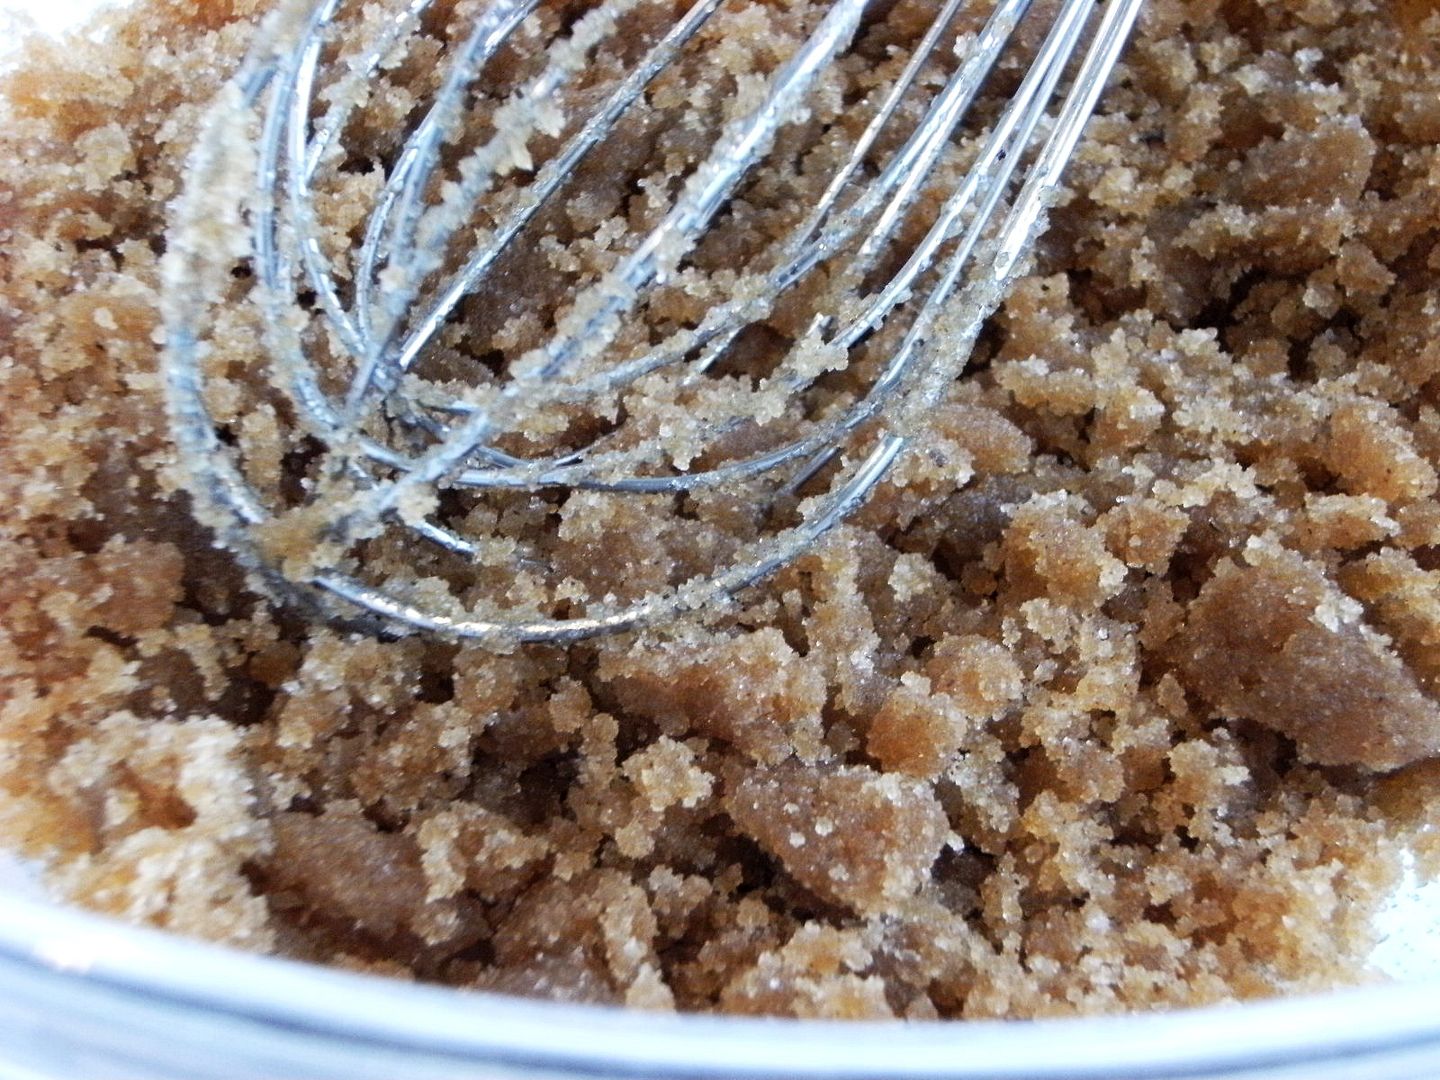
Stir in the almond oil. Spoon into the glass container and secure with lid.

How simple is that? And if you are like me, you already have all the ingredients at your fingertips with the exception of the almond oil. I have a feeling you could easily find almond oil at your local health food store, or perhaps even at Michaels. I'd like to try to get my hands on some soon to whip up a big batch of this scrub--some to give away and some to keep, of course!

Stay tuned as the Twelve Days of Christmas continue with many more fantastic handmade gift ideas.

All photos are from Bake at 350.

Wednesday, November 11, 2009

Mason Jar Sewing Kit

I love the look of these sweet little mason jar sewing kits from Martha Stewart Living. I could sing the praises of the usefulness of mason jars all day long. Not only are these little mason jar sewing kits adorable, they are extremely practical. I have caught the sewing bug lately, inspired by my favorite crafter, and I could certainly use a few of these jars around my studio to house my small but growing collection of threads. I have a stray mason jar around from some hot cocoa mix I made last Christmas and I can't wait to make one of these! If you are interested in making your own, Martha offers some instructions and there is a great tutorial by Creative Ramblings with some very helpful step-by-step photos.

Happy crafting!

Thursday, November 5, 2009

Bookworm

I have loved the look of the these floating bookshelves since I first discovered them at the Curiosity Shoppe almost three years ago. These genius little gems are designed by Ezra Waltermaurer of Little Fish Furniture. Their quirky design are perfect little conversation pieces and make the ideal shelf to display any of your favorite flowers or knick-knacks. I just love them!

I have been wanting to try my hand at creating a few of these bookshelves myself. I found a tutorial to create a similar look of a stack of books. For those who aren't so craft savvy, you can find the books for sale at the Curiosity Shoppe or directly though Ezra's Etsy shop.

Wouldn't they look sweet with a little vase of billy buttons?

Monday, November 2, 2009

Dreaming of Green

click images for source

With the days getting shorter and the weather being dreary and raining more often than not as of late, I have been craving sunlight and greenery. I have fallen in love with the idea of filling my apartment with sweet little living accents.

I am dying to take on the project of creating a few little terrariums for my apartment. I love the fact that you can use almost any glass container to create a unique, one of a kind accent for your home. Craftzine has a great tutorial for how to create a mason jar terrarium. There is also a fantastic video on Design*Sponge by the folks at Sprout Home which shows how to build and care for a terrarium. I'd love to create a few in sweet little mason jars as well as some in more elaborate apothecary jars. I love how to can make them look wonderfully serene or totally kitsch by adding a few little plastic gnomes and deer. There are so many great tutorials and tons of inspiration online for those who are interested in creating their own terrariums. And for those who like a less hands-on approach, this Etsy seller has some fantastic terrarium creations for sale.

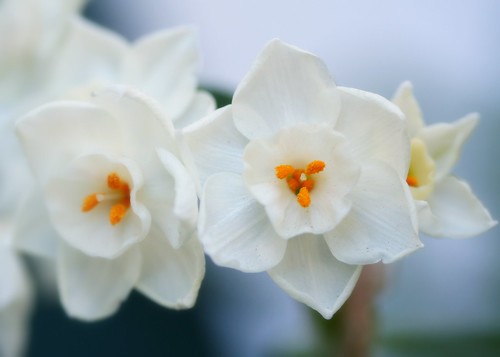
Another little project I'd like try is growing paperwhites. From the tutorials I've seen, like this great one from John & Sherry at Young House Love, they are incredibly simple to grow! You can grow these gorgeous flowers in anything from water to rocks to potting soil. And even more fabulous is that they thrive indoors in the winter. I will definitely be testing out my green thumb on these beauties soon.

What are your favorite ways to add a little life and color to your home?
Related Posts Plugin for WordPress, Blogger...

Share Buttons